
Step 4 - Pick and Place
| Material | Blue print of PCB, Solder paste |
| Tools | Magnifying glasses, tweezers |
| Needed Skills |
Good eye sight and firm hands |
| Time | circa 60 minutes |
Once the solder paste is applied to the PCB based, We now proceed with placing the electronic components.
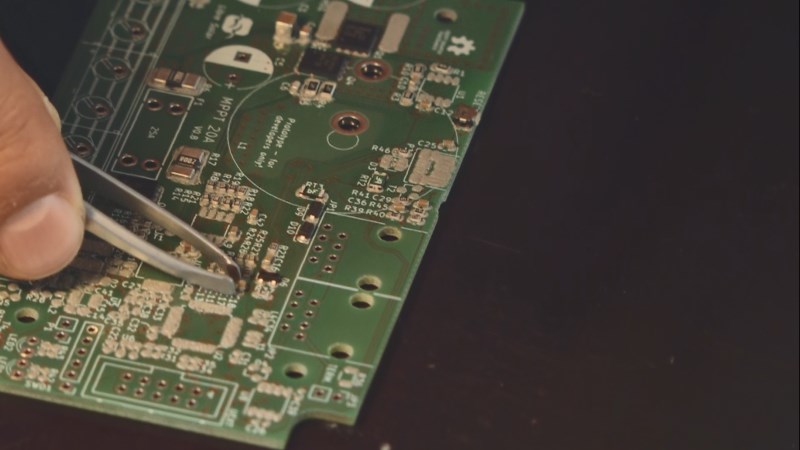
Here you see the different between the PCB with soldermask but without electrical parts and the PCB with electrical parts.
Reading the PCB layout
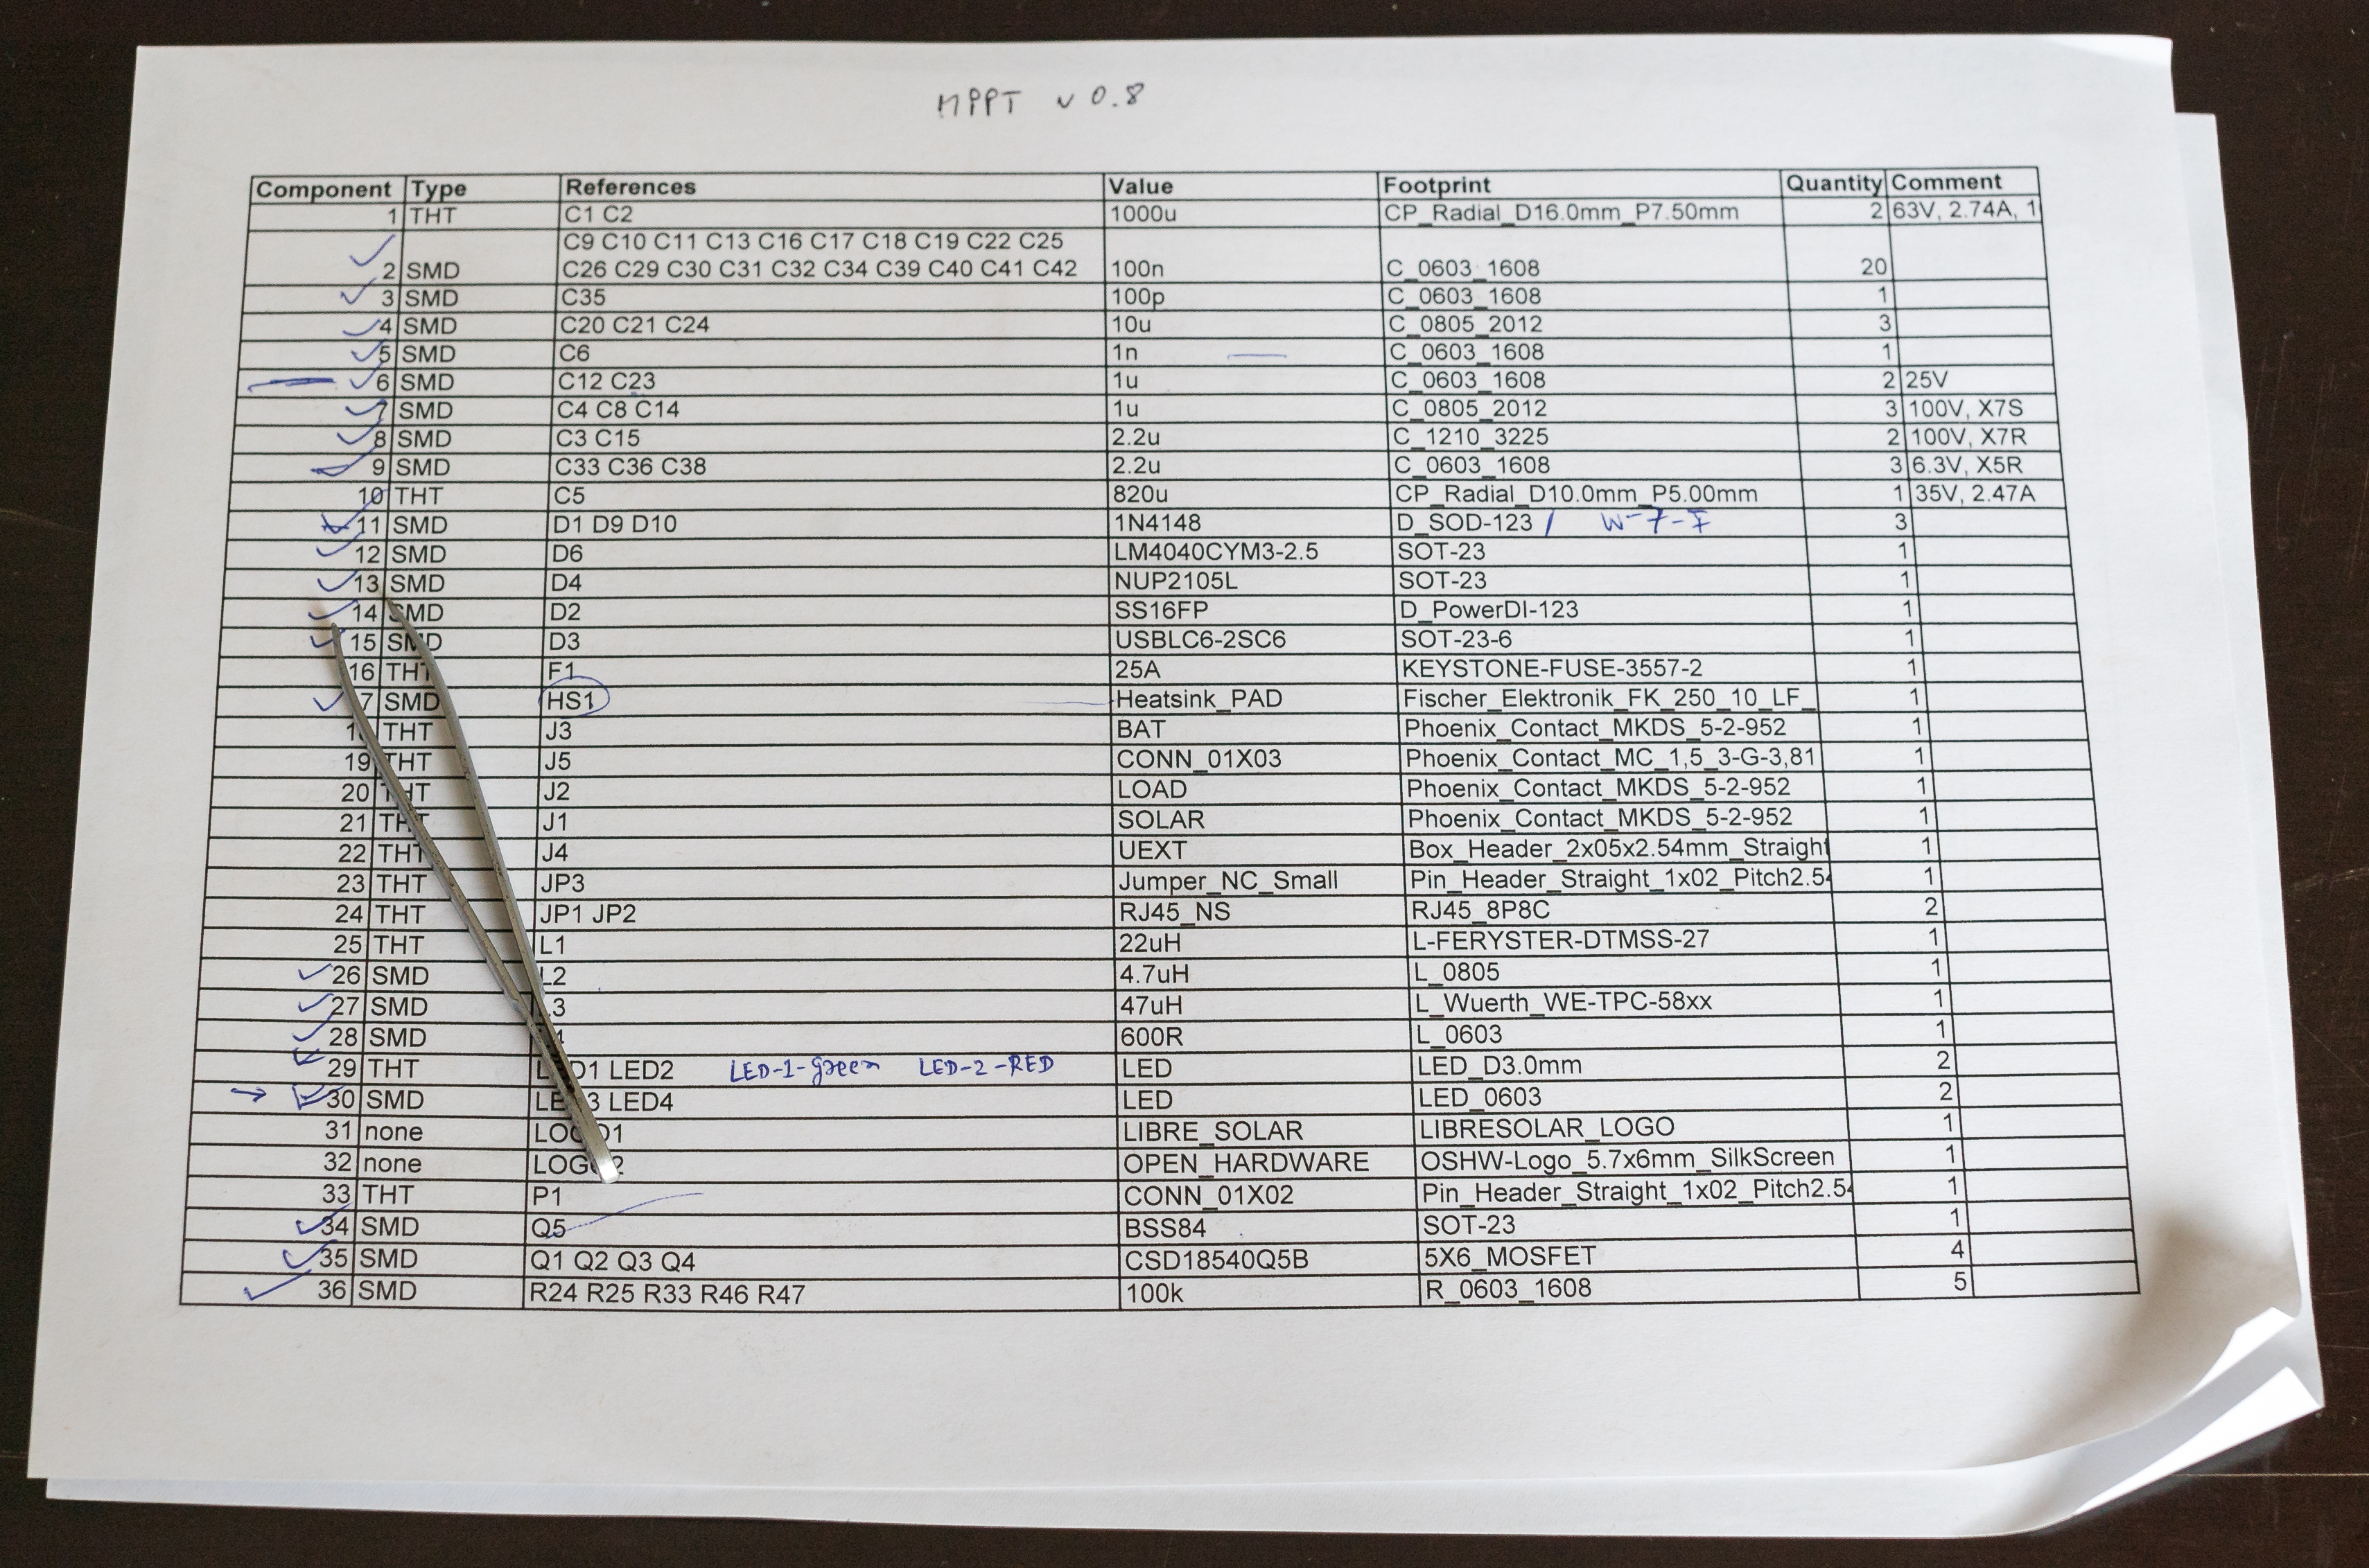
Since there is a long list of components to be placed, It is easier to organize them in orderly fashion, for ex: starting with resistors of one class and then the next by referring the Items list as show below.

Placing the components
The electronic components are picked up with the help of tweezers and are placed on the PCB layout, for precision a magnifier lens can be used. Look carefully for the orientation of the components.
Inspection before proceeding to re-flow oven:
Once the step is completed, we do an inspection to see the pins are seated on the respective markings.
